How to Clean a Fountain Pen | A Step-By-Step Guide
If you are new to fountain pens, the idea that you need to clean them from time to time may seem a little strange. Think of it this way, a fountain pen is a precision writing instrument and so proper maintenance is very important to keep the ink flowing. Luckily, it’s also very easy and very straightforward.
This article will walk you through it.
I am a “Process Guy.” I am constantly thinking of ways to make things easier, quicker, more efficient, and less wasteful. This is the best method I have come up with so far that is quick, uses few tools, and works effectively.
For this example, I will use the beautiful Esterbrook Estie Oversize in Nouveau Bleu with the Estie FLEX nib. This fountain pen has an internal converter and these are one of the most common types of fill mechanisms you’re likely to encounter out there, and so it makes sense to start with these.
The basic princples are the same regardless of the fill mechanism and this article will give you a solid foundation to clean any similar pen correctly.
When Should I Clean a Fountain Pen?
- When you’re changing inks
- When your pen is brand new
- If your pen isn’t flowing properly
- Every three months, regardless
If you use the same color ink in your fountain pen, then you really don’t need to clean it for a very long time. You should probably clean it every three months or so to keep it clean and flowing nicely, but I have gone years without cleaning a pen without issue.
However, part of the fun of using a fountain pen is exploring different inks. You can change inks whenever you want, but if you do so without cleaning the pen, you will get a funky mix of different color inks together and some of these are not pretty. If you’re changing inks, you need to clean your pen.
Also, if you feel as if your pen is not flowing properly, sometimes this is due to different oils and residues inside the pen that build up at strategic places. A good cleaning will take care of this.
It is also a good idea to clean your pen when you first purchase it. This will wash away whatever remnants of the manufacturing process may still be present inside your pen. It is good practice to wash a pen as soon as you receive it.
This is a basic clean. It should handle 99% of any dried ink or other issues you might encounter.
[Learn more: How to Buy Your First Fountain Pen | Everything You Need to Know]
How to Clean a Fountain Pen
Here’s your step-by-step guide to everything you need to know — and you can also watch my handy video above for a more animated education.
1. Disassemble the pen
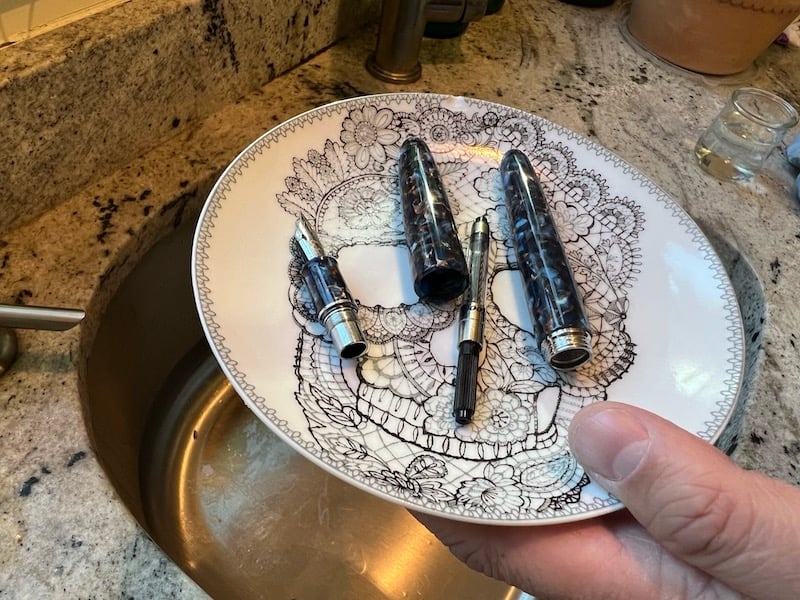
Unsurprisingly, the first step is to disassemble the pen. Unscrew the grip from the barrel and set it and the cap aside. We are dealing with the nib, the section and feed, and the converter.
2. Rinse the nib
Rinse the nib beneath a quick burst of water. This gets all the superficial ink away from the nib and section. This way, it is clean for the next step.
3. Fill the pen with water
Get a small jam jar or some such (I keep one by the sink) and fill it with some water. Dip the nib and fill up the pen with water just as you would with ink. The water will mix with the remaining ink inside the converter and be very dark.
4. Expel the water
Twist the converter screw and expel the water into the sink. This will flush out a lot of the ink and water that is inside the pen.
5. Rinse the nib again
Rinse the nib to get the ink and water mix away from the nib. We want it clean so we can dip it back into the jar with water without making the water in the jar dirty. We want to flush the pen with clean water and put all the dirty water into the drain. This way we save some water as well.
6. Repeat
Repeat this process until the water runs clear and clean from the nib. It usually takes anywhere from three to ten or more times. A nice pen and converter like this takes around four or five times.
7. (Optional) Rinse the converter
Your pen is probably very clean at this point, but if you want it perfect, then follow this extra step. Remove the converter from the section. Some unscrew and others pull off. Once you do, you can rinse the back of the section and the front of the converter.
You can also fill the converter from the jar of water, if necessary.
8. Dry the components
Now, put the pen pieces together on a paper towel or somewhere else safe. The pen will dry in a few hours.
Personally, I don’t worry about a tiny bit of ink that may remain inside the converter. However, you can prop it up on a paper towel and allow it to drain down into it. Eventually, it will dry completely.
Wrapping Up
You are now free to fill it up with any ink you wish and begin writing again. Cleaning a pen before refilling ensures that you get a pure expression of the color of the ink unaffected by previous inks that were in your pen that may mix with it.
If you found this article helpful and know someone else who can use it, please send them the link. Check back soon for additional articles, how-to-s, and other information.


