Updated Jan 12, 2026
How R.M. Williams Makes the Definitive Australian Boot (Factory Visit)
This post may contain affiliate links that at no additional cost to you, I may earn a small commission from.
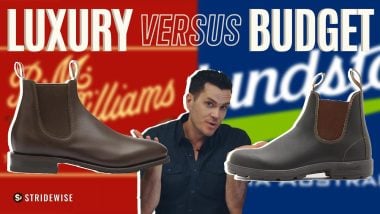
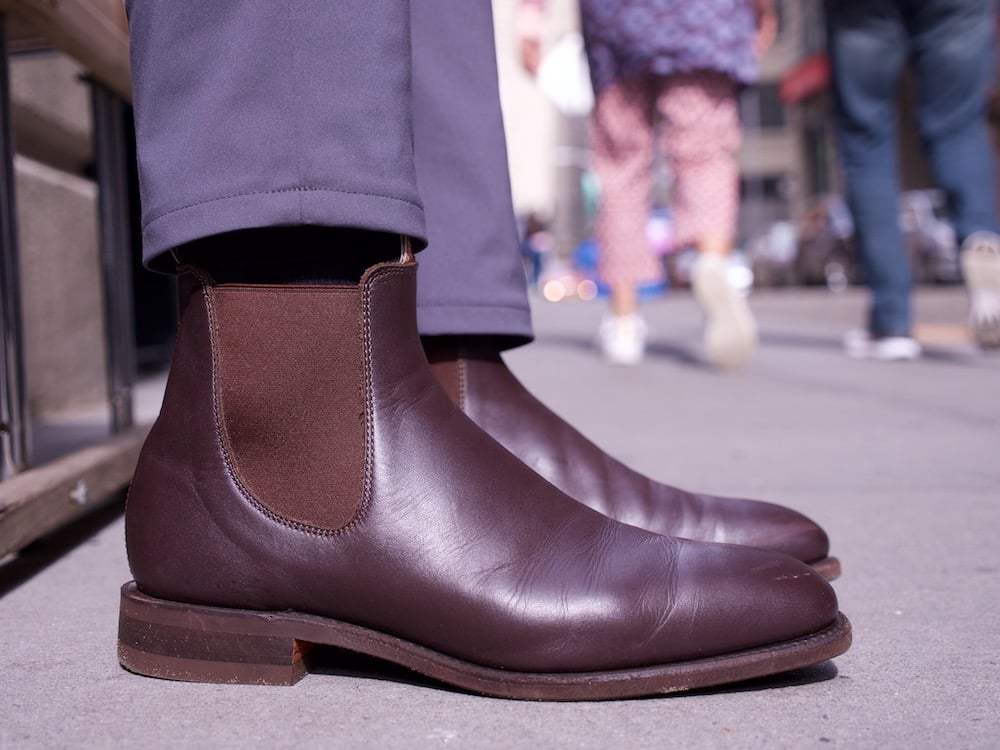
The nation of Australia has exactly one boot: the R.M. Williams Chelsea. (Although they prefer the term “elastic sided boot” Down Under.)
Chelseas are so popular and widespread in Australia that most people just call them “boots” — because if you’re wearing boots in Australia, they’re pretty much guaranteed to be Chelseas.
R.M. Williams does sell a couple of lace up models, but I was completely unsurprised when they told me that well over 90 percent of their sales are Chelseas. This young country, unburdened by centuries of footwear norms, appears to have decided en masse that if you have a more convenient alternative to laces, it’d be silly to wear anything else.
New York City based but Australian by birth, I was visiting my parents on the country’s eastern coast when R.M. Williams reached out to ask if I’d like to see their factory in South Australia.
Having visited factories in over a dozen countries and none in my homeland, I leapt at the chance. This is Australia’s national boot, and it felt like eight years of covering the boot industry all over the world had been leading to this moment.
This YouTube video, specifically:
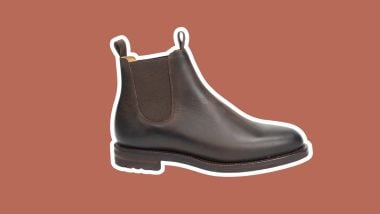
Pure Australiana
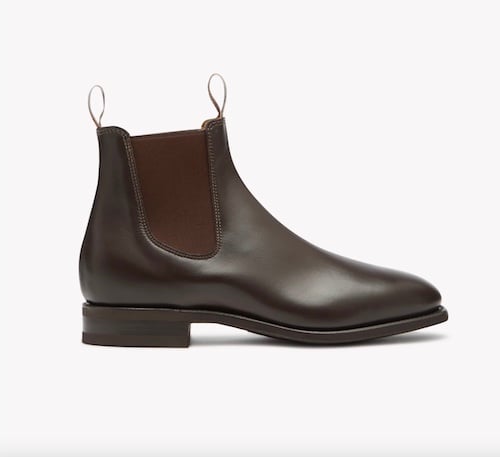
R.M. Williams Comfort Craftsman
Check Official Store
Check Amazon
This is the most popular boot from Australia's most popular boot brand, made with a single piece of supple yearling leather that combines the best of calfskin and cowhide.
We earn a commission if you make a purchase, at no additional cost to you.
Why Every Australian Owns R.M. Williams Chelseas
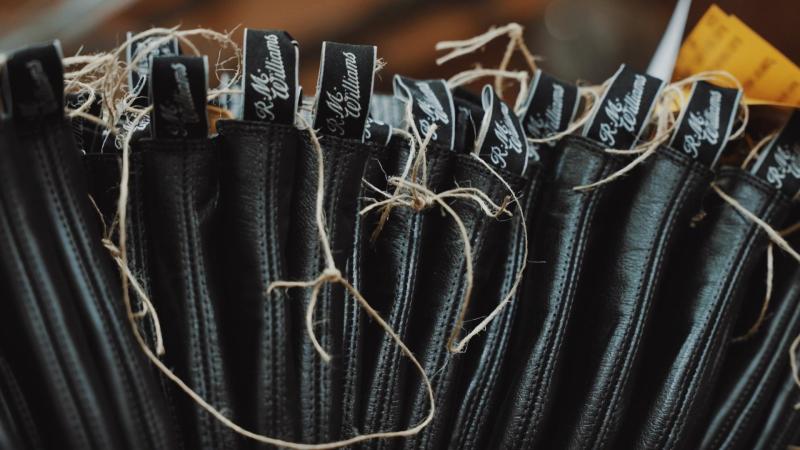
- Made with a single piece of leather; there’s just one seam, running up the heel and ankle
- Typically made from a year-old cow; combining benefits of calfskin and cowhide
- Resoleable Goodyear welt construction, which is rare for Australian-made boots
- Huge range of models, fits, widths, and lasts; no brand has so many variations on the Chelsea
- Ubiquity at all levels of Australian culture is a consistent sign of the country’s egalitarianism
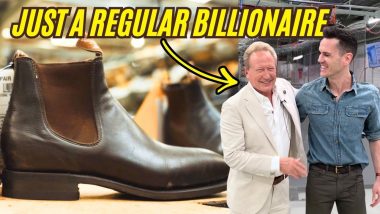
Founded in 1932 by Reginald Murray Williams, this is a company that has managed to remain Australian made and Australian owned. It hasn’t always been the case: it was bought by a French conglomerate in the 2010s, but returned to Australian ownership when the nation’s richest man, Dr. Andrew Forrest, AO, bought it back in 2020.
The move is working out: in 2025, they doubled the size of the factory. Check it out, I interviewed the guy while I was there:
It’s way cheaper to make Chelseas from several pieces of leather, but R.M. Williams only makes “whole cut” Chelseas. It’s become part of the brand, but according to my tour guide (and the brand’s Head of Footwear and Accessories Development) David Cook, it has a function as well.
“The company was obviously born in the country, and it was functional for that way of life,” he says. “There was a lot of horse riding, a lot of boots in stirrups, so the one-piece design was beneficial for reducing wear and tear around the heel and for keeping dust out. And a boot with fewer seams has fewer places that can tear.”
Americans might hear that and start thinking of their cowboys of old, and they’d be right to: both countries had their own “Wild West” colonial periods of settling an untamed land with questionable amounts of violence — but they wound up settling on different boots.
“I guess the difference is that (America’s) boot season is cold and wet,” says David. “Our boot season’s all year round and it’s in the dry, dusty Outback.”
Yes, the United States has deserts too. But David’s point is that while Western boots and Chelseas both have long histories of being used for horse riding, Australians favored something lighter weight and easier to put on quickly. Americans went with a taller boot that was more capable of handling mud, marshes, and other hazards that are more common in a country with more rainfall.

R.M. Williams’ Leather
- Most boots sold are made with yearling leather, a term for a year-old calf
- Kangaroo leather is also popular
- Suedes and other leathers are also available, sometimes from international tanneries
The most popular leather is their yearling leather in Chestnut, a versatile brown that has enough red in it that it can look just a little purple or grey in the right light.
Yearling leather is unusual: it’s a year-old calf, which puts it right in the middle of turning from calfskin to cowhide.

“It’s not a calf, but it’s not an old cow and it’s not a bull,” says David. “It’s soft and supple, but it’s also very strong at the same time.”
Put simply: calfskin has a finer grain and wrinkles less conspicuously than cowhide, which is why it’s the go-to for dress shoes. Surprisingly, calfskin is also stronger than cowhide: because the animal hasn’t grown to its full size, the skin fibers are more densely packed.
Further Reading
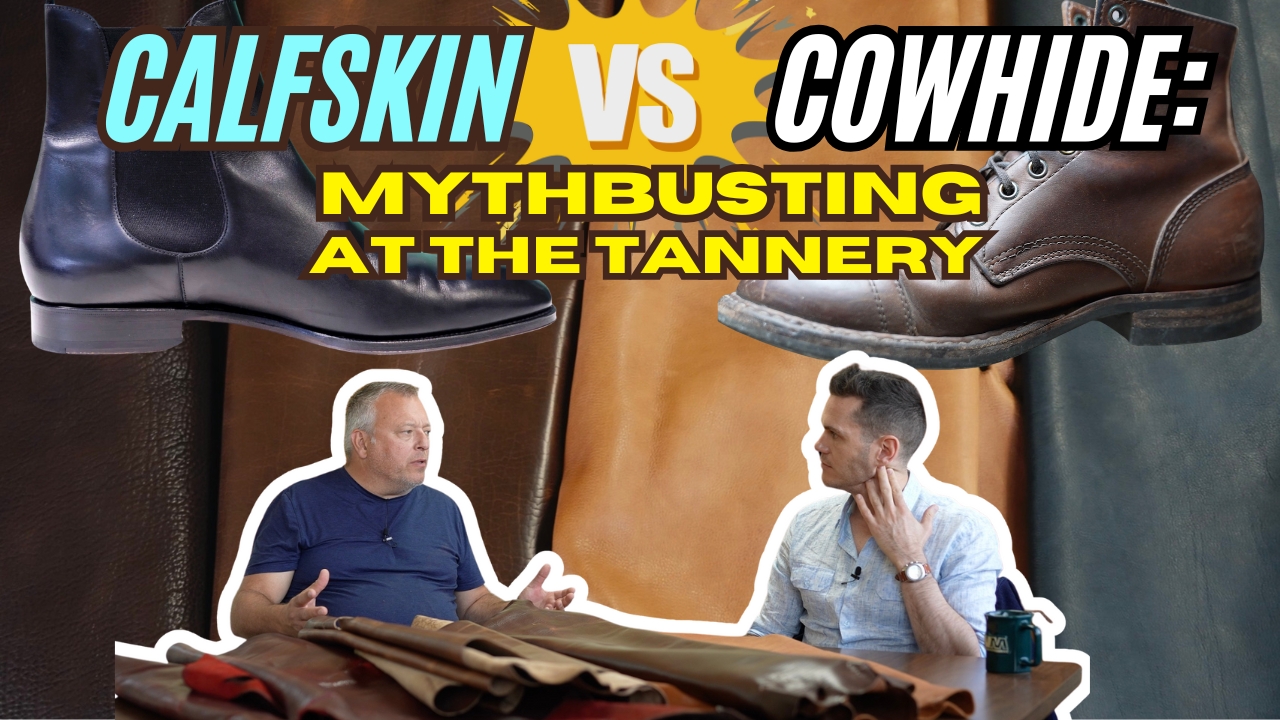
Calfskin vs Cowhide: An Expert Tanner Compares
We went to one of the USA’s premier tanneries to learn the surprising truth about calfskin’s durability and dressiness. Learn more →
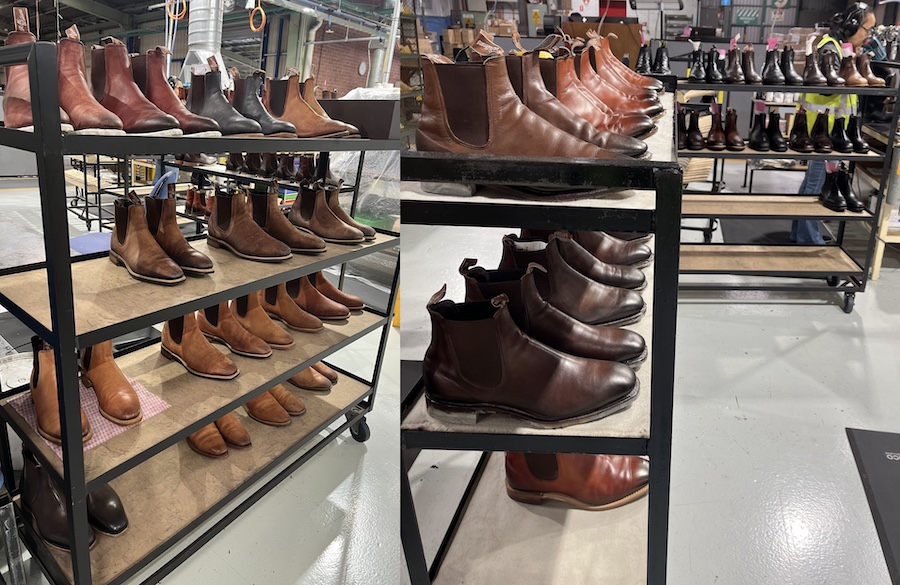
Another reason to emphasize yearling leather is that a whole-cut Chelsea requires one very big piece of unblemished leather, and younger animals have fewer scars, tick bites, and less wear and tear than you get on an older animal.
They don’t disclose their tanneries (I’ve tried), but sometimes R.M. Williams will use leathers from well known international tanneries like like Chicago’s Horween and England’s C.F. Stead. These tend to be limited runs, though: the Australian customer base is married to that yearling leather.
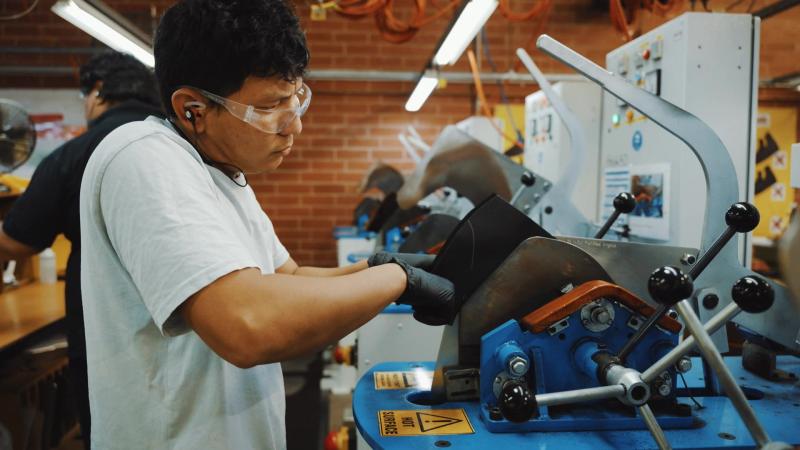
Clicking
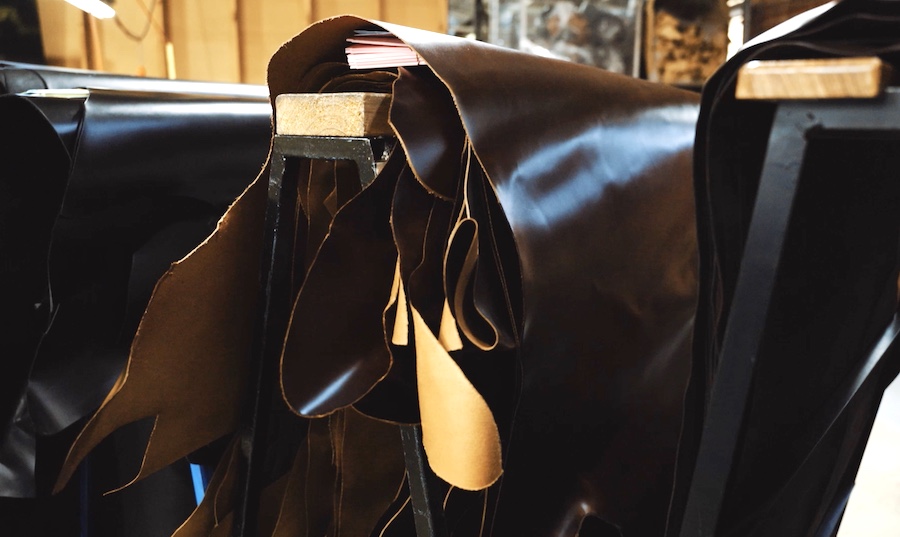
- Selecting and cutting the right pieces of leather from the hide
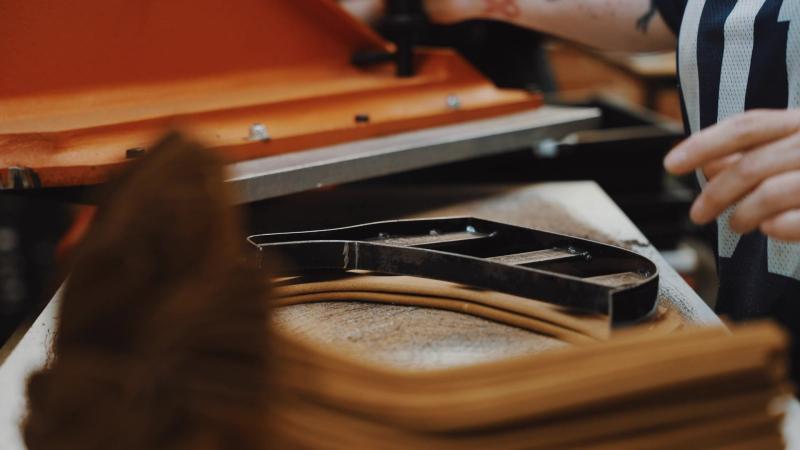
The first step is the clicking, which refers to selecting and cutting out the pieces of the hide that you’ll use for the different parts of the boot.
“It has to be a very clean piece of leather because we do a whole-cut,” says David. “We can’t afford scars or blemishes.”
Of course, it’s more complicated than it sounds: clickers need to not only find enough “clean” leather (or make sure the blemishes will be covered up by other parts of the boot), they also select different parts of the hide for different purposes. For example, a boot’s toe should be tougher because it takes more damage, the midfoot should be more pliant and flexible, and so on.
Because whole-cut construction demands flawless panels, a significant amount of leather gets discarded. But those scraps get reused for smaller goods that R.M. sells, like bags, belts, and keyrings.
“What we need to make sure we do is have really good specifications for our leather,” says Amy Barnes, the Sydney-based Head of Footwear, Accessories, and Lifestyle, who joined us for part of the tour. “We account for things like tear strength and moisture content because this process puts the leather under a lot of pressure. So it has to be top quality leather both aesthetically and structurally.”
Shaping
- A preliminary step to help give laceless boots their shape
Then we move into what we call shaping: machines use heat, steam, and pressure to give the leather its shape. It also stretches the leather, requiring it to be cut a second time at the end of the process.
I’ve been to a lot of factories and I don’t think I’ve seen this step performed on any lace up boots. It’s a process to help give laceless boots their shape.
“Crimping is a similar step that’s common in Europe, and it’s a less severe form of shaping machine,” says David. “We use blocking machines that uses heated blades, and they’re custom made locally — you can’t buy them anywhere else.”
These boots are also lined with cowhide, which undergoes its own blocking process.
Further Reading
How Carmina Makes Europe’s Dressy Chelsea
If you’re curious about how these processes vary across different factories and countries, check out our trip to the Spanish island of Mallorca. Learn more →
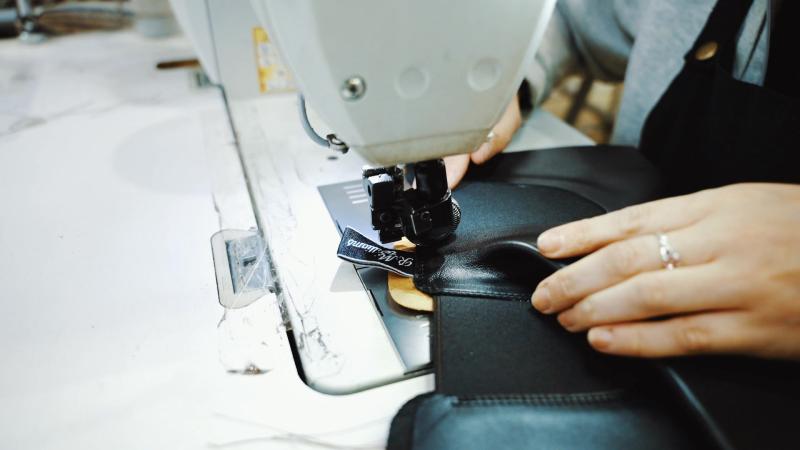
Closing, a.k.a. “Fitting Up”
- Attaching the separate pieces of the boot’s upper together
This is when the pieces of the boot — the upper, the lining, the elastic panels — are sewn together in preparation for the lasting, which is when it’s pulled over the foot-shaped mold. In other words, this is where the whole boot becomes 2D before it becomes 3D.
I learned that Australia uses different terminology to the factories I’ve visited in the Americas, Europe, and Asia. They all call this process “closing,” but R.M.W. use the more charming term “fitting up.”
When you watch someone do it quickly, it looks simple. But I know from the time I tried making my own boots that there’s a ton of skill that goes into all of these steps, even when the craftsperson can do it in the blink of an eye.
“We reinforce the back seam with a strip of reinforcing tape using a twin needle,” explains David. “From there, they turn the uppers inside out again to stitch the back seam. Because of the one-piece construction, the boot has to be turned twice during this process.”
With a whole-cut Chelsea, there’s only one seam in the entire boot, so it has to be reinforced as much as possible!
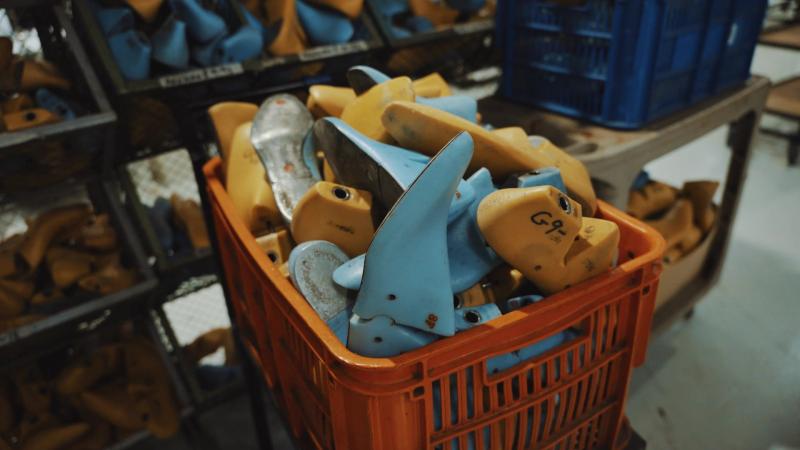
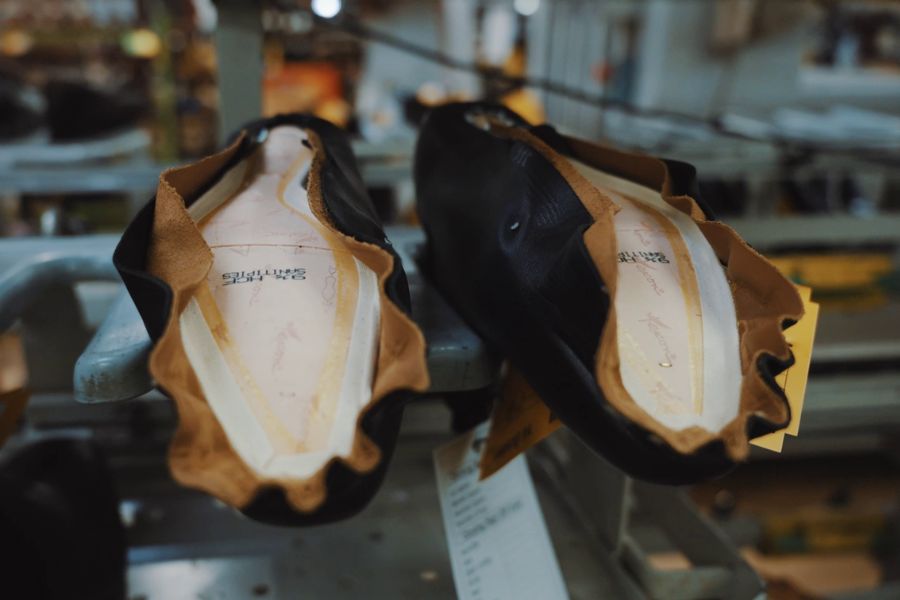
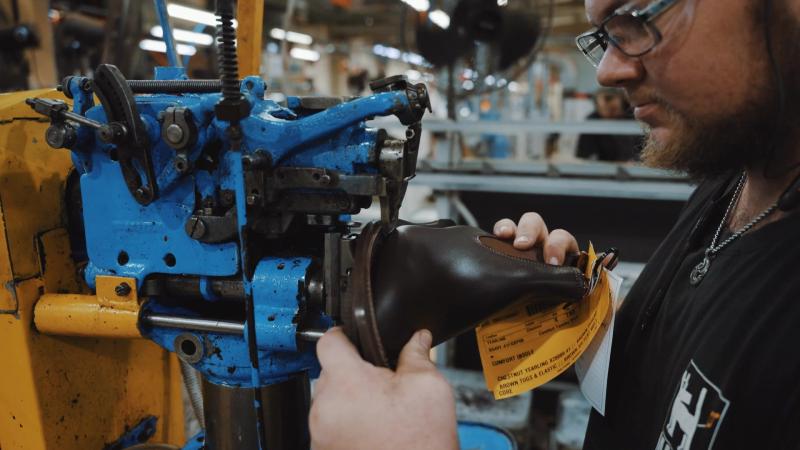
Four-Part Lasting
- The completed upper is stretched over a foot-shaped mold (the “last”), giving it the right shape, size, and fit for the model
The lasting is a very big deal.
Every footwear brand spends a lot of time developing their lasts: the foot shaped mold that determines the shape and fit of the finished product. Every single last is unique; there’s endless variety not just because there are so many different foot shapes, but also because there are countless different preferences for fit, comfort, arch support, volume, sleekness, and more.
In a world where everyone has access to the same machinery and suppliers, the last is sometimes considered the only thing truly unique to a company, and they’re closely guarded. Corporate espionage in the boot world often revolves around stealing a last. It happens!

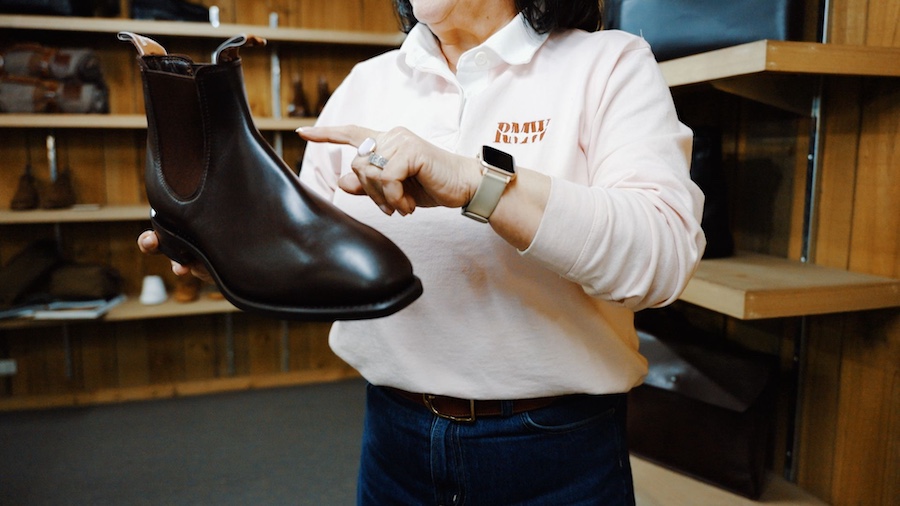
“It’s the different last shapes that really can take a Chelsea boot from really casual to really formal,” says Amy. “The Craftsman is our chisel-toe last. It was created in the 1960s and it was R.M.’s town boot, it’s what he wore in the city. Ultimately, I think that last was the gateway: it’s what brought the boot out of the bush and into the rest of the country.”
Boot brands vary by how much machinery they use to last. The extremely handmade ones (like the best known Indonesian makers) last entirely by hand, but you can use up to four machines.
Further Reading

Is It Better to Last Boots By Hand or Machine?
We visited a dozen factories and quoted four bootmakers to answer this age-old debate.
Learn more →
There’s a lot of work involved in getting leather to conform to a last, especially on a Chelsea boot, and especially on a wholecut Chelsea, where every contour shows.
R.M. Williams uses a four-part lasting process to pull the upper over the last and attach it to the bottom. Machines are used for the front, back, and stapling, but the side lasting is done by hand.
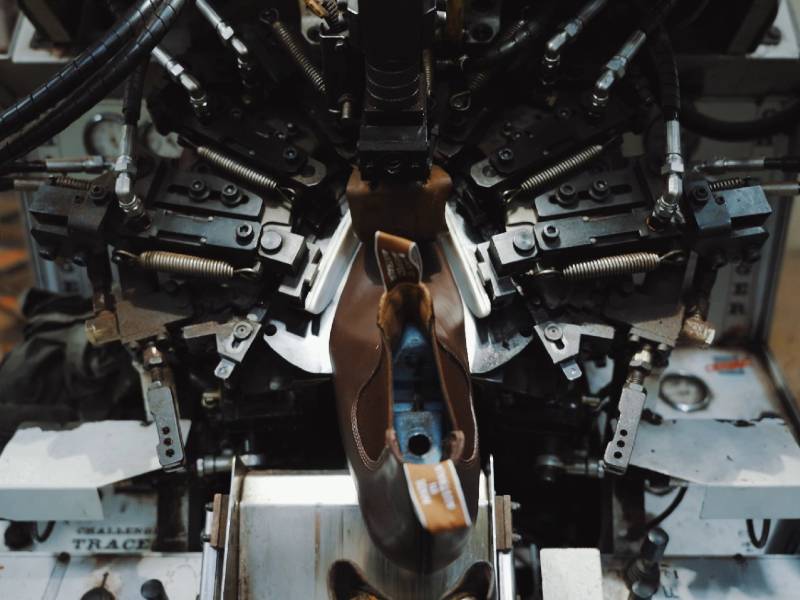
1. Toe lasting (machine)
The softened toe box is pulled over the last and attached to the front of the insole.
“Because we’re doing welted footwear, we can’t attach everything in one operation. The upper has to meet the rib tape piece by piece,” explains Dave. (“Rib tape” is what Australians call the canvas rib or gemming, a strip of cotton that’s glued under the insole and sewn to the welt.)
2. Back-part/seat molding (machine)
“After toe lasting, we move to seat molding,” says David. “The heel counter is preheated so it shapes easily, then the back of the boot is molded and nailed to hold it in place. This step attaches the back of the upper to the insole.”
3. Side/waist lasting
This part of the operation is done by hand!
“The front and back are already molded, so now we concentrate on pulling in the waist and securing it to the rib tape to get that tight instep curve and make sure the front of the upper sits down firmly on the last,” David explains. “It’s good to perform this part of the operation by hand because it gives better control over both the leather and the shape.”
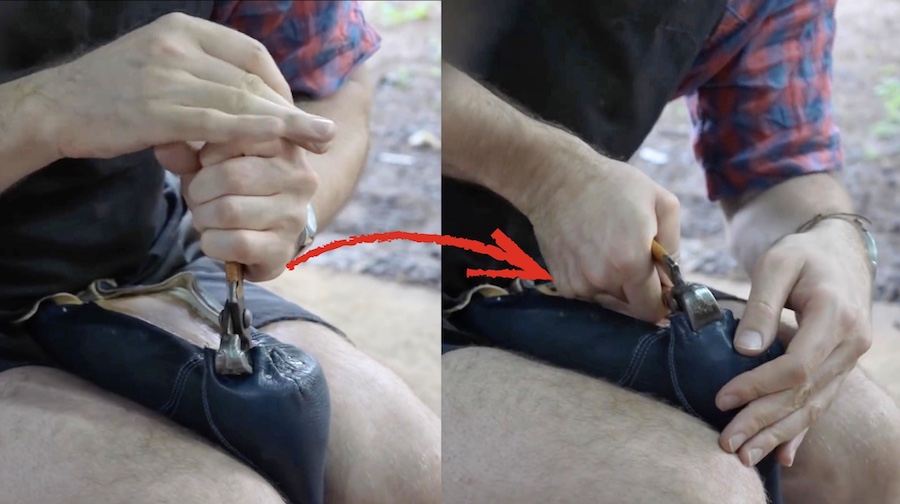
Many bootmakers, particularly the more analogue, will tell you that hand lasting is an artform more than anything else: it requires a near-mystical understanding of the individual piece of leather’s desire to move, stretch, and stay.
I’ve done it, and I learned just enough to know that I had nowhere near the skill and strength of a hand laster.
4. Stapling (machine)
The final step is the stapling machine, which locks the hand-tacked waist into place.
“The staples secure the upper to the rib tape all along the midfoot,” says David. “With that, the upper is fully lasted to the insole.”
Wrinkle Chasing
- Helping the leather to take up the shape of the last after it’s been attached
One of several stages that I’d never seen before (and again, I’ve been to a lot of factories) is the wrinkle chase machine.
“It uses steam and hot air to tighten the leather down onto the last, smooth out any remaining high points, and soften the small marks created during blocking,” says David. “It makes the upper lay flat and look cleaner.”
In short: it chases wrinkles away.
Then the boots are sent through a heat tunnel.
“While the wrinkle-chase machine targets specific areas, the heat setter provides an overall, even heating that finalizes the form of the upper to the last,” says David. “It ensures the boot keeps the exact shape we’re aiming for.”
This part of the process can actually take a lot of different forms: I’m talking about what you do to the leather once it’s on the last to make sure it keeps its shape after the last comes out.
Some workshops I’ve seen use heat tunnels like this, some put the boots in a sauna-like room, some use small ovens, some finish the process by rapidly cooling the leather. Some use time instead of heat: if you leave the leather on the last for a week or three, it’ll take up its shape very well.

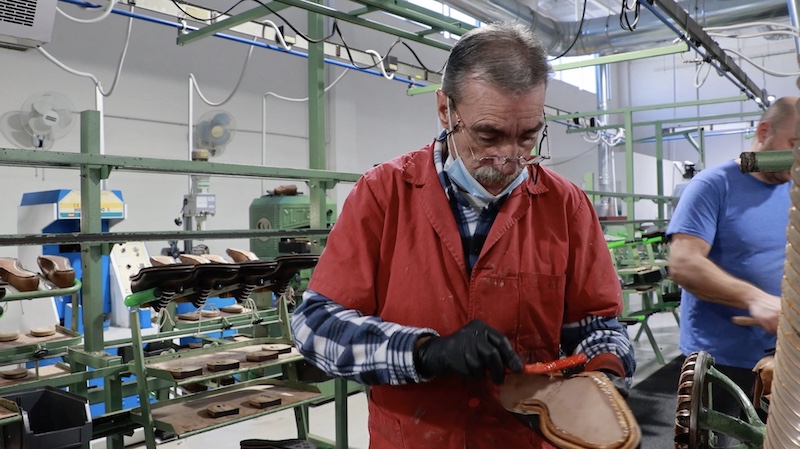
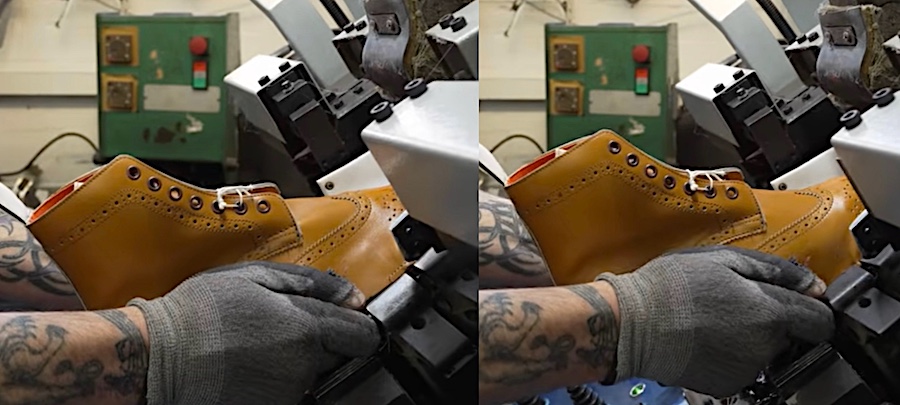
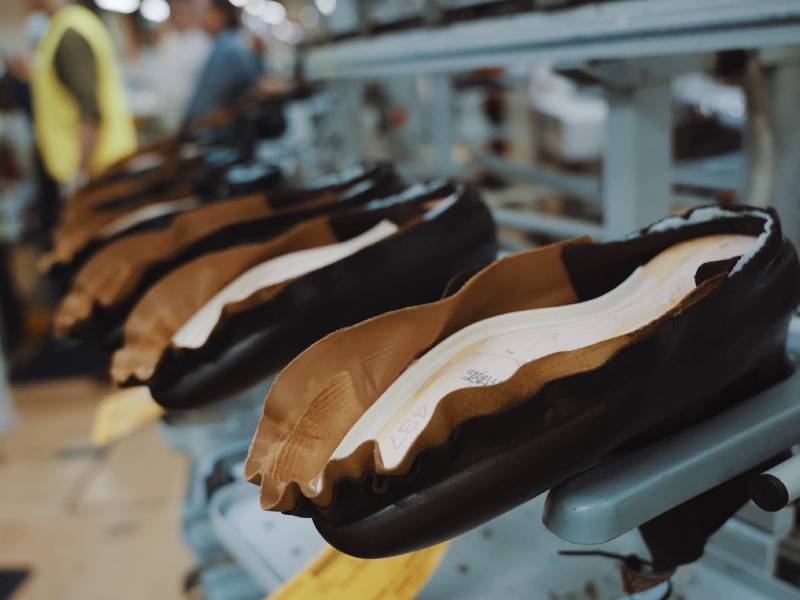
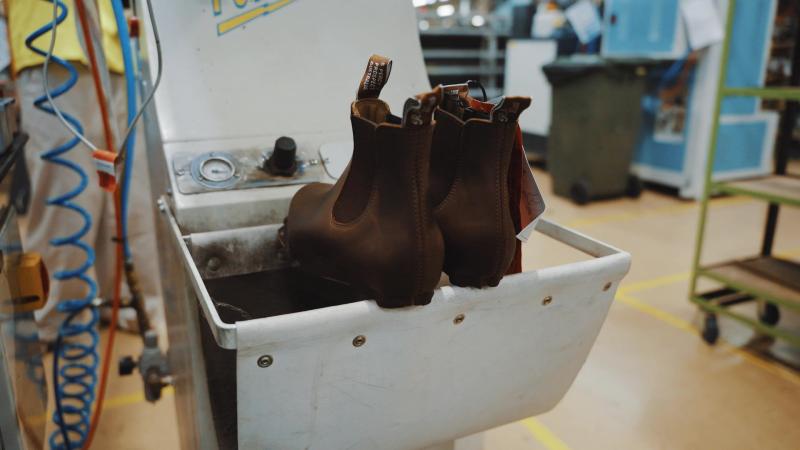
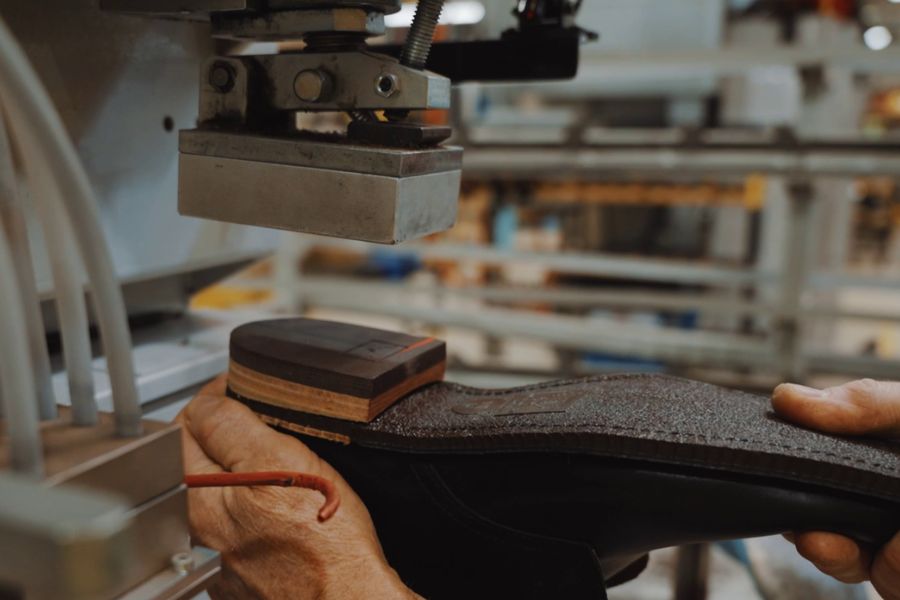
Bottoming, or, R.M. Williams’ Goodyear Welt
- Attaching the (multiple) layers under the insole (or lasting board)
This is what separates good boots from disposable footwear: this is where it becomes resoleable.
“We’ve already glued and stapled everything down,” says Dave. “The final step is attaching the leather welt, which locks the upper to the rib tape and gives us the strip of leather we’ll later stitch the sole to.”
There are many ways of making boots resoleable but the most common is this Goodyear welt. Put very simply, it’s easy to swap out their soles because instead of the upper and the outsole being attached to each other, they’re attached to a strip of leather sandwiched between them: the welt.
“When we resole a boot, we can bring it right back to this stage and attach a fresh sole,” says David. “With cheaper cemented footwear, once you wrap the leather under the shoe and grind it down to stick the sole on, pulling it apart destroys the boot.”
There’s way more to talk about regarding what goes into making a boot Goodyear welted and the various forms that it can take. R.M. Williams’ bestseller, the Comfort Craftsman, has a rubber outsole and a foam insole for optimal shock absorption, while the one that’s just called The Craftsman has multiple leather soles.
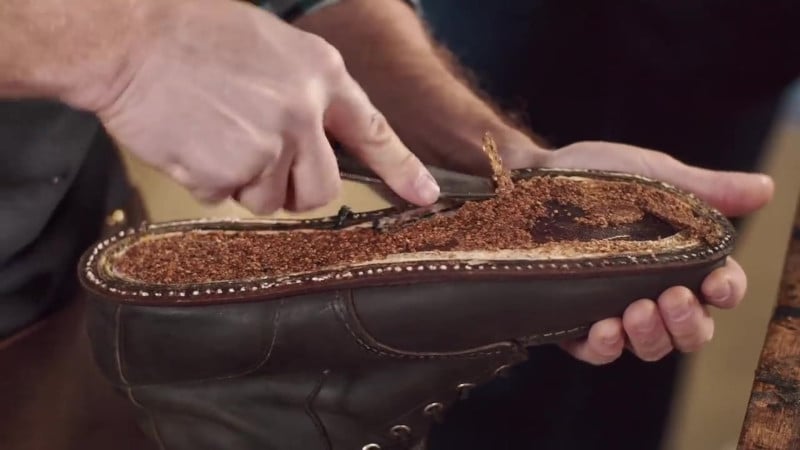
But the welt always creates an empty space to fill and it’s practically always filled with cork, an old fashioned way of improving shock absorption and comfort while also helping to manage moisture, odor, and airflow.
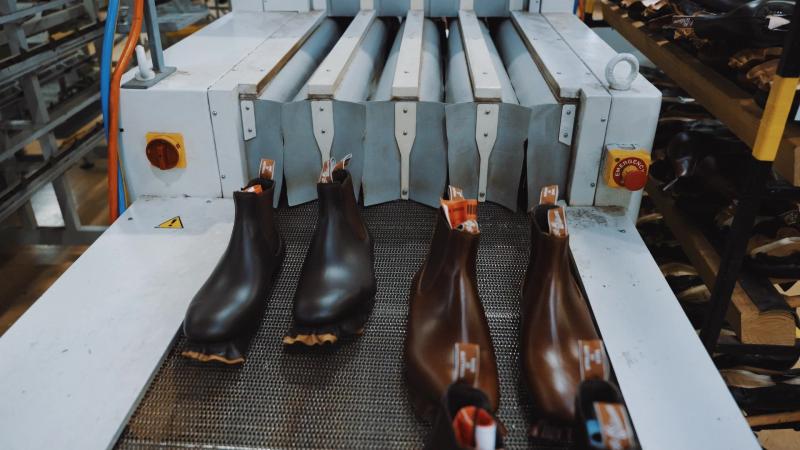
Preparing to Attach the Outsole
“Once the boot is ‘fully lasted,’ meaning the welt is on, and the bottom has been glued, it’s ready for sole attachment,” says David. “To do that, we heat-activate the bottom of the boot and the sole. Both are coated in glue, and heat plus pressure bond them together.”
They also help the glue stick by roughing up the bottom of the boot with sandpaper or harsh brushes, because it’s a lot easier to glue something fuzzy than something smooth.
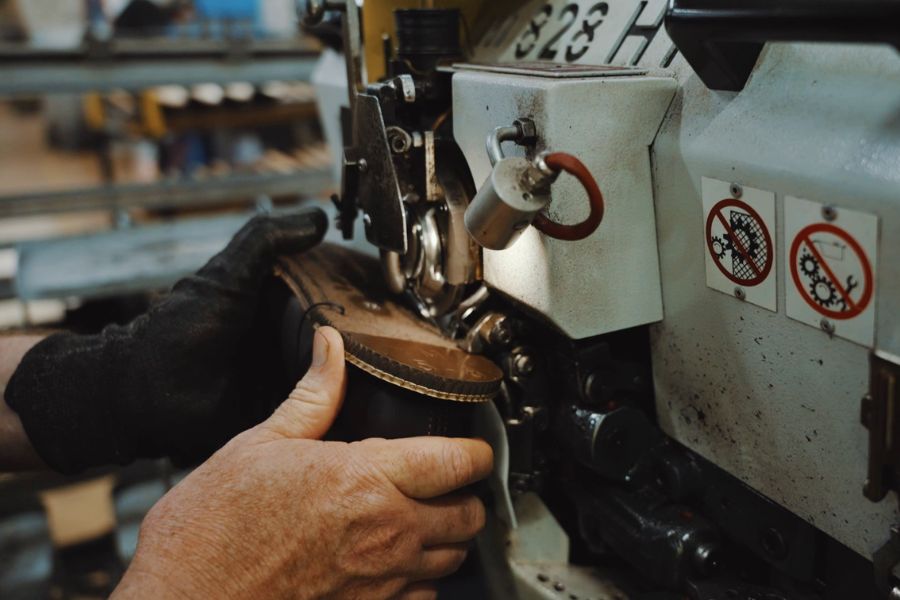
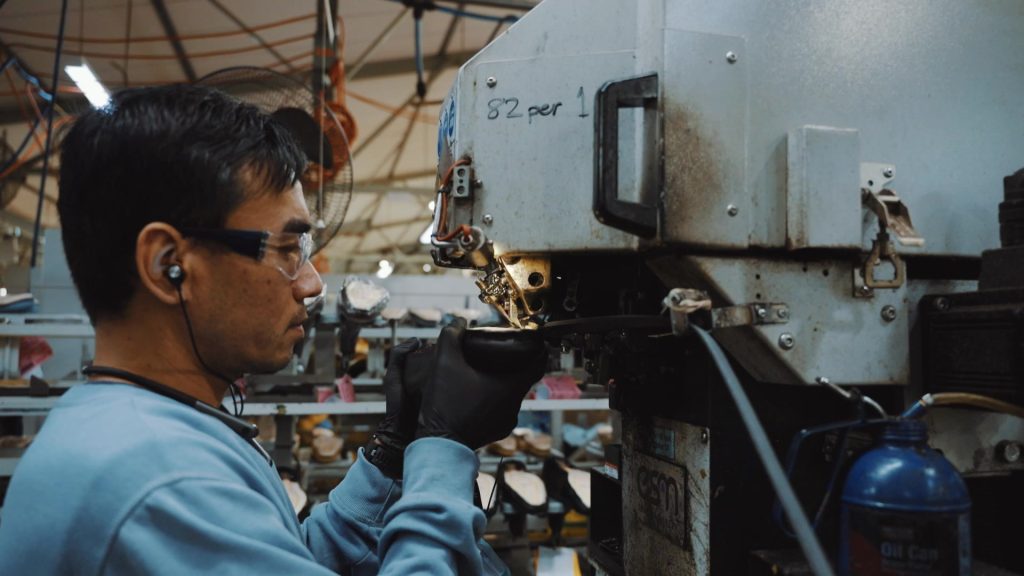
Sole Stitching
No, they don’t just glue the sole on.
“Here is where we stitch the sole to the welt,” says David. “The stitch doesn’t go all the way through to the insole, it only passes through the welt, connecting the outsole securely without penetrating the inside of the boot.”
There’s one row of stitching attaching the outsole, and they make sure it can endure being scuffed and stepped on thousands of times a day.
“We use a lockstitch here,” says Dave. “The stitch locks inside the material, so even if you wear through the stitching on the sole side, it stays secure and doesn’t compromise the attachment.”
Heel Attachment
“Finally, we attach the heel,” says David. “Nails are driven in from inside the boot, so the last has to be removed. We heat-activate the bottom of the boot again, apply glue, heat-activate the heel, and press the two parts together.”
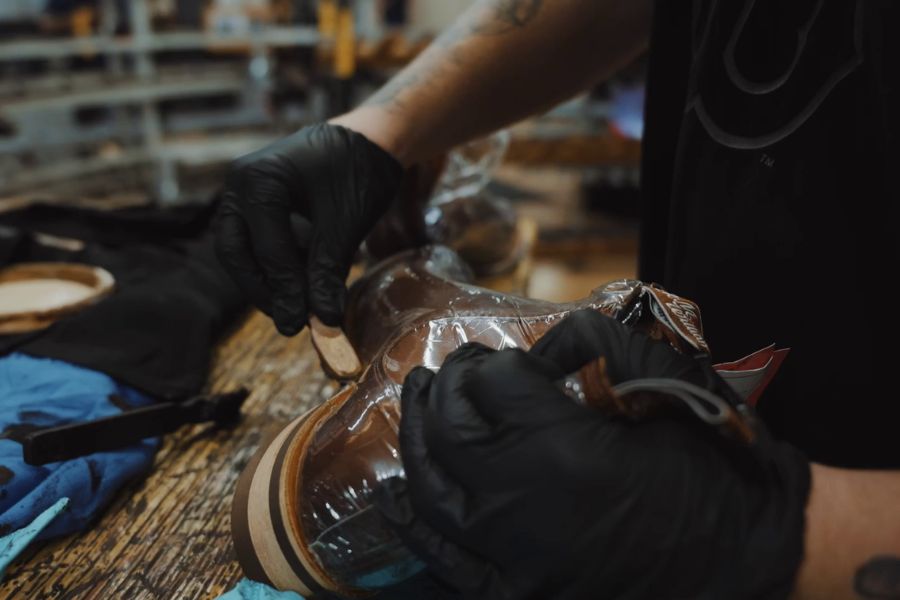
Finishing
- Polishing, smoothing, painting, and quality control
The final part is all about the details.
Craftspeople smooth the heels and edges with several kinds of sanding, buffing, and slicing machines.
“This is where a lot of handcraft comes back into the process,” David notes. “Most of the earlier steps run through automated stations, but finishing is largely done by hand: tidying up edges, smoothing surfaces, and refining the overall look.”
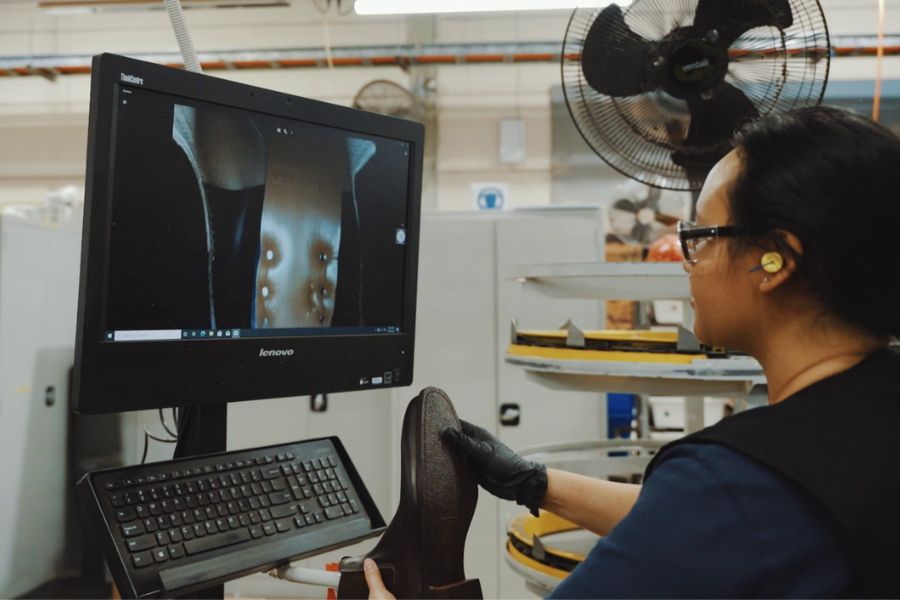
They even inspect the inside of the boot with a camera, which I hadn’t seen before.
After that, it’s the staining and painting of the heel and welt, smoothing the heel with sandpaper, polishing it with a horsehair brush to help the oils and dyes settle, and giving the boot a final clean.
Wrapping Up
That’s the full story of how R.M. Williams makes their boots.
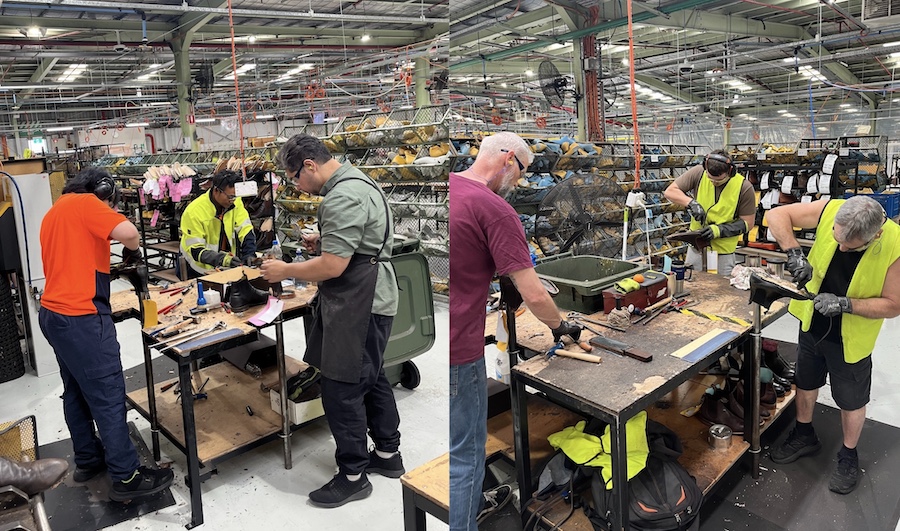
And I didn’t even mention the huge section of the facility for repairing, resoling, and relasting customers’ worn out boots. Those processes were even more manual than the processes used to make them!
I’m delighted to report that despite having visited a zillion other boot factories and workshops, there were a lot of techniques and technology here that I hadn’t seen before. I’m sincerely grateful to R.M. Williams for the education.
Pure Australiana
R.M. Williams Comfort Craftsman
Check Official Store
Check Amazon
This is the most popular boot from Australia's most popular boot brand, made with a single piece of supple yearling leather that combines the best of calfskin and cowhide.
We earn a commission if you make a purchase, at no additional cost to you.