How to Distress Leather Boots | 5 Ways to Get The Worn In Look Fast
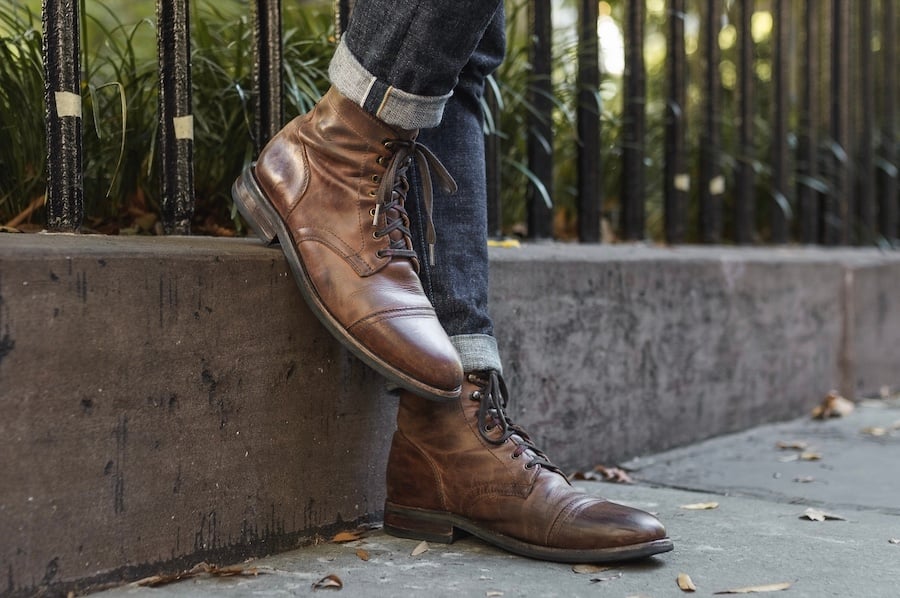
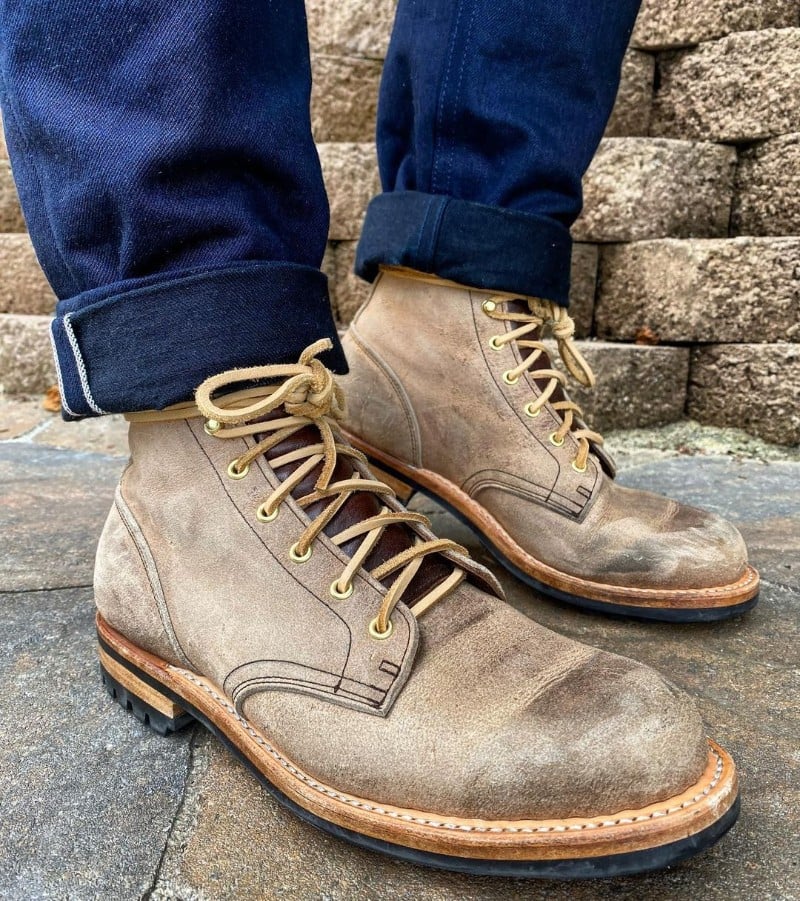
Leather boots are a classic and stylish choice for any wardrobe, but sometimes a brand-new pair can look too polished and perfect. If you want to give your boots a more lived-in, distressed look — which is often more coveted than the out-of-the-box look — there are a few simple techniques you can use at home.
In this article, we’ll walk you through the steps for distressing your leather boots to give them a vintage, rugged appearance. Whether you want to add some character to a new pair of boots or give an old pair a fresh, trendy update, distressing leather boots is a fun and easy way to add some personal style to your footwear.
You don’t need any special equipment, just a few inexpensive household items. The same techniques can be used with a heavy hand or gentle touch, depending on how distressed and worn-in you want the boots to look. It is a good idea to start with a more conservative approach, examine the results, and adapt your techniques as you work to get the specific look you desire.
If you continue reading, this article will show you five surprising ways to age your leather.
What You’ll Need to Distress Leather Boots
- Leather boots (our favorite boots)
- Sandpaper/rough sponge
- Dark polish or leather dye
- Soft cloth or brush for applying polish/dye
If you want to give your leather boots a distressed look, there are a few tools and materials you’ll need to gather before you get started. First, you’ll need a pair of leather boots that you want to distress. It’s best to use a pair that is made of real leather, as synthetic materials may not take to the distressing process as well.
Next, you’ll need some sandpaper or a rough sponge. These tools will help you scuff up the surface of the boots, giving them a worn and weathered appearance. You’ll also need a darker shoe polish or leather dye, which you can use to add depth and shading to the distressed areas.
Other optional materials you may want to have on hand include a soft cloth or brush for applying the polish or dye, as well as a sealant or protective spray to help preserve the finished look of your boots.
With these tools and materials at the ready, you’ll be well-equipped to give your leather boots a trendy and stylish distressed look.
How To Distress Leather Boots: Few Simple Ways
Distressing can be done both naturally and chemically. Natural distressing needs some muscle work whereas chemical distressing makes your work a little bit easier. Some of the methods of distressing are discussed briefly below:
Distress Leather Boot With Rubbing Alcohol
One technique for distressing leather boots is to use rubbing alcohol. This method can be a quick and easy way to give your boots a worn, vintage look. Here’s how to do it:
- Begin by wiping down the surface of your boots with a clean, dry cloth to remove any dirt or debris.
- Dip a cotton ball or sponge in rubbing alcohol and dab it onto the surface of the boots. The alcohol will help to soften the leather, making it more pliable and easier to manipulate.
- Use your fingers or a rough sponge to rub and scuff the surface of the boots in the areas where you want to create a distressed look. (The heel is where you normally see wear marks start to accrue.) The alcohol will help to break down the surface of the leather, giving it a more worn and weathered appearance.
- Once you’re happy with the level of distressing, allow the alcohol to evaporate completely before wearing or storing your boots. You may also want to apply a leather conditioner or sealant to help protect the distressed areas and preserve the finished look of your boots.
Keep in mind that this method can be quite effective, but it can also be somewhat unpredictable. The alcohol may cause the leather to lighten or change color in unexpected ways — color variation is what a lot of guys like about worn in boots — so it’s important to be prepared for some variation in the final result.
Distress Leather Boot By Using Sandpaper
Another technique for distressing leather boots is to use sandpaper. This method can be a bit more time-consuming, but it can also be more precise and controlled, allowing you to achieve a more specific and consistent level of distressing. Here’s how to do it:
- Begin by wiping down the surface of your boots with a clean, dry cloth to remove any dirt or debris.
- Use a piece of medium to coarse grit sandpaper to rub and scuff the surface of the boots in the areas where you want to create a distressed look. Sand the leather in a circular motion, applying moderate pressure as you go.
- As you sand, you may want to use a softer cloth or brush to remove any excess dust or debris. You can also use a shoe polish or leather dye to add depth and shading to the distressed areas, if desired.
- Once you’re happy with the level of distressing, use a soft cloth to buff the surface of the boots and restore their shine. You may also want to apply a leather conditioner or sealant to help protect the distressed areas and preserve the finished look of your boots.
- Seriously, adding a conditioner like Cobbler’s Choice or Venetian Shoe Cream is key to making beat up boots look well taken care of.
Keep in mind that this method can be quite effective, but it can also be somewhat time-consuming. It’s important to be patient and take breaks as needed to avoid over-sanding or damaging the leather.
Distress Leather Boot With Black Shoe Polish
A big part of achieving an aged look for your boots is making the finish look uneven. Sandpaper does this by wearing away parts of the finish, but you can also add finish to achieve a similar effect.
Using black or very dark brown shoe polish on a pair of lighter boots will make it seem like they were once darker. This will trick the eye into thinking your boots are well-worn, even when they’ve never seen the light of day.
To achieve a distressed look with shoe polish, add the polish to the areas that are least likely to see wear. These areas are the opposite of the spots you’d hit with sandpaper. Avoid the toe, seams, and sides of the heel. Instead, apply the polish to the safer parts of the boots. The additional dark polish will make it look like your boots were once a much darker color. By leaving the high-wear portions untouched, you’ll make it seem like the boots have faded in those spots.
I highly recommend looking at pictures of worn boots prior to applying the polish. This will help you create organic-looking patterns. You can also combine this method with sandpaper to achieve an even more authentic distressed effect.
Distress Leather By Striking a Rock Against Your Boots
Another technique for distressing leather boots is to strike them with a rock. This method can create a rugged, worn look that is perfect for giving your boots a vintage, outdoorsy vibe. Here’s how to do it:
- Begin by wiping down the surface of your boots with a clean, dry cloth to remove any dirt or debris.
- Find a smooth, rounded rock that is about the same size as your fist. You may also want to wrap the rock in a cloth or towel to protect the leather and reduce the risk of damaging it.
- Hold the rock in your hand and gently tap it against the surface of the boots in the areas where you want to create a distressed look. Be sure to apply only moderate pressure, as too much force could potentially damage the leather.
- As you tap the rock against the boots, you may want to use a softer cloth or brush to remove any excess dust or debris. You can also use a shoe polish or leather dye to add depth and shading to the distressed areas, if desired.
- Once you’re happy with the level of distressing, use a soft cloth to buff the surface of the boots and restore their shine. You may also want to apply a leather conditioner or sealant to help protect the distressed areas and preserve the finished look of your boots.
Keep in mind that this method can be quite effective, but it can also be somewhat unpredictable. The pressure and impact of the rock may cause the leather to lighten or change color in unexpected ways, so it’s important to be prepared for some variation in the final result.
Hitting Your Leather Boots with a Hammer
Things you’ll need: Hammer, Old cloth, Rubber band.
- First, tie the old cloth around the hammer using a rubber band.
- Hammer the toe, heel and the side of the boots. This will soften the boots.
Hammers are a readily available tool in almost every house. These hammers can also play a lead role in distressing your leather boots. Just take a hammer and start banging the toe cap and heels of your leather boots with it. You need to apply a medium level of pressure. Neither too small nor too much as you do not want the hammer to damage your boots. With a little effort, your boots will be all set to be worn.
Be careful while hammering the boots,don’t hammer it so hard out of excitement that you end up breaking the sole.
How to make your Leather Boots Appear Well-Conditioned even after being Distressed?
Obviously when you will treat your leather boots with any of the tips mentioned above, no matter how recently you bought your leather boots, they will start appearing to be worn out.
Although our goal was to achieve perfectly distressed leather boots which we can easily achieve by following any of the tips discussed over here however, we still do not want to compromise on the look of our newly bought leather boots.
Therefore, here are some tips for keeping your distressed leather boots looking their best:
- Clean and condition the leather regularly. Use a leather cleaner and conditioner specifically formulated for the type of leather you have. This will help to nourish the leather and keep it supple, while also helping to protect it from drying out or cracking.
- Use a leather protector or sealant. After you’ve cleaned and conditioned your boots, consider applying a leather protector or sealant to help preserve their finish and protect them from dirt, water, and other elements.
- Avoid over-wearing your boots. While distressed leather boots can give off a rugged, lived-in vibe, it’s important to remember that they still need to be treated with care. Let your boots rest for a day between wears, ideally with cedar shoe trees in them.
- Store your boots properly. When you’re not wearing your boots, store them in a cool, dry place away from direct sunlight or heat. This will help to prevent the leather from drying out or becoming brittle.
By following these simple steps, you can keep your distressed leather boots looking stylish and well-conditioned for years to come.
Pros and Cons for Distressing Leather Boots
Pros:
- Distressing leather boots can give them a unique and stylish appearance, making them stand out from other footwear.
- Distressing can help to hide small scratches, scuffs, or blemishes on the surface of the boots.
- Distressing can add character and personality to a new pair of boots, making them feel more “lived-in” and personal.
- Distressing can be a fun and creative DIY project, allowing you to customize your boots to your own tastes.
Cons:
- Distressing leather boots can be time-consuming, depending on the method you choose.
- Distressing can be unpredictable, and the final result may not always be exactly as you had hoped.
- Distressing can potentially damage the leather if it is not done carefully, reducing the lifespan of the boots.
- Distressing may not be suitable for all types of leather or all situations. Some people may prefer the more polished look of new leather boots.
Conclusion
In conclusion, distressing leather boots can be a fun and easy way to add some personal style and character to your footwear. Whether you want to give a new pair of boots a vintage look or update an old pair with a trendy, rugged appearance, there are a few simple techniques you can use at home. By using sandpaper, rubbing alcohol, or a rock to scuff and wear down the surface of the leather, you can create a distressed look that is unique to your own style.
Just be sure to use caution and care when distressing your boots, as the process can potentially damage the leather if not done properly. With the right tools and a little bit of patience, you can create a pair of distressed leather boots that are truly one-of-a-kind.
How do I make my shoes look weathered?
Scuff up your footwear with sandpaper. Fold a sheet of sandpaper in half and rub it on your shoe. Focus on the heel and toe, where you'd find more wear on a naturally worn shoe. Then, wear down the rest of the shoe to your liking.
How can I age my boots fast?
The easiest way to distress leather boots is to rub a rock against the leather. Find a stone with a decent amount of surface area and a mostly smooth surface. Rub the rock against your leather until you begin to see slight scuff marks to achieve a broken-in, distressed look. Fresh leather is oh-so-pleasing to the eye.
What does Vaseline do to leather boots?
If you apply it on the damaged area, it can make scratches or minor tears disappear in no time. In addition, it brings back the natural color of the leather, and it makes it soft like it was when you first bought it. In order to apply the Vaseline, you first need to clean the stained area with warm water.






Join the Discussion